

I know I've been promising for awhile to share some recycling ideas with you. But I have too many ideas in my head and in so many areas but never enough time! But I did snap some pictures for you for this project.
Because of my health issues I keep antibacterial wipes all around my house and also have one in each car. I even use these when working with my polymer clay as they remove the clay from all surfaces very well.
 The problem is all these leftover containers that I feel guilty about each time I toss one in the recycle bin. It is a #2 PET and can be recycled into all kinds of things but I wanted to try my hand at some home recycling first, there will always be plenty to add to the bin! So I am sure you have had your share of these, next time you use one up save it for this project.
Items needed: One empty washed out moist towelette container
X-acto knife
Artwork and scrap paper for template
Tape and or glue And a ruler or measuring tape
Mine wipe containers are 40 count and I noticed that both my local
 grocery stores (different ones) must use the same manufacturer as once you get the label off you can see they are exactly the same.
What ever brand you use it must have this kind of towel dispenser, some of the name brands won't work.
You will now need to remove the inner flange that holds the towels in the ready to pop out position. To do this you need to use the X-acto knife and CAREFULLY!


Hold the top of the container with your non dominant hand with a good solid grip. Don't let your fingers near the bottom part as the knife could slip and give you a nasty cut! you will start cutting from the top of the flange piece keeping your knife up against the inside rim. Go slowly, take your time. When you've cut halfway down, stop and reposition your non-dominant hand so that it still remains as far away from the knife as possible.


When you are done it will look like this. You can save the part you cut away for a cool red mustache project!
Now You will want to use your X-acto blade to carefully slice down the paper label and then tear it off. There will be some glue left from where they attached it but as long as you get the paper off you don't have to be too particular with getting the glue off, it will be covered in the next step.
 Now you will take some art work of your own, photographs (best color copied at a copy shop) or magazines, books, any paper ephemera you have or find some nice scrap-booking scraps you have and use them for this. I used some pictures from a Under sea book with beautiful artwork. This is a way to enjoy artwork from coffee table books all the time instead of the occasional look through once a year or so.
Now you will notice that the container has a rim on the top and on
 the bottom, this is where you will fit your artwork. Measure the circumference by taking a tape measure or using a piece of string and then measuring that against a ruler (don't use yarn it can stretch and give you an inaccurate measurement).
Now using your ruler you want to measure from the top of the bottom of the rim to the bottom rim. This is a recessed area where the original label went. Write both measurements down on the scrap paper indicating the height and width. The label usually doesn't cover that entire area but you should do this if your artwork will allow to make a smoother presentation.
Now measure out on your scrap paper these two dimensions and cut out your template. Now check it against the container to make sure it fits right. Once you have your template fitted you will now use this to cut out your artwork. Place your template over your artwork and hold up to the light to center it in the best position. Then trace around it with a pencil on the wrong side. Cut it out and place around the container. You can glue it on but be careful with bumps, I used clear packing tape to tape my ends together. If your artwork is shorter, it doesn't matter as you will be using these only facing one direction.
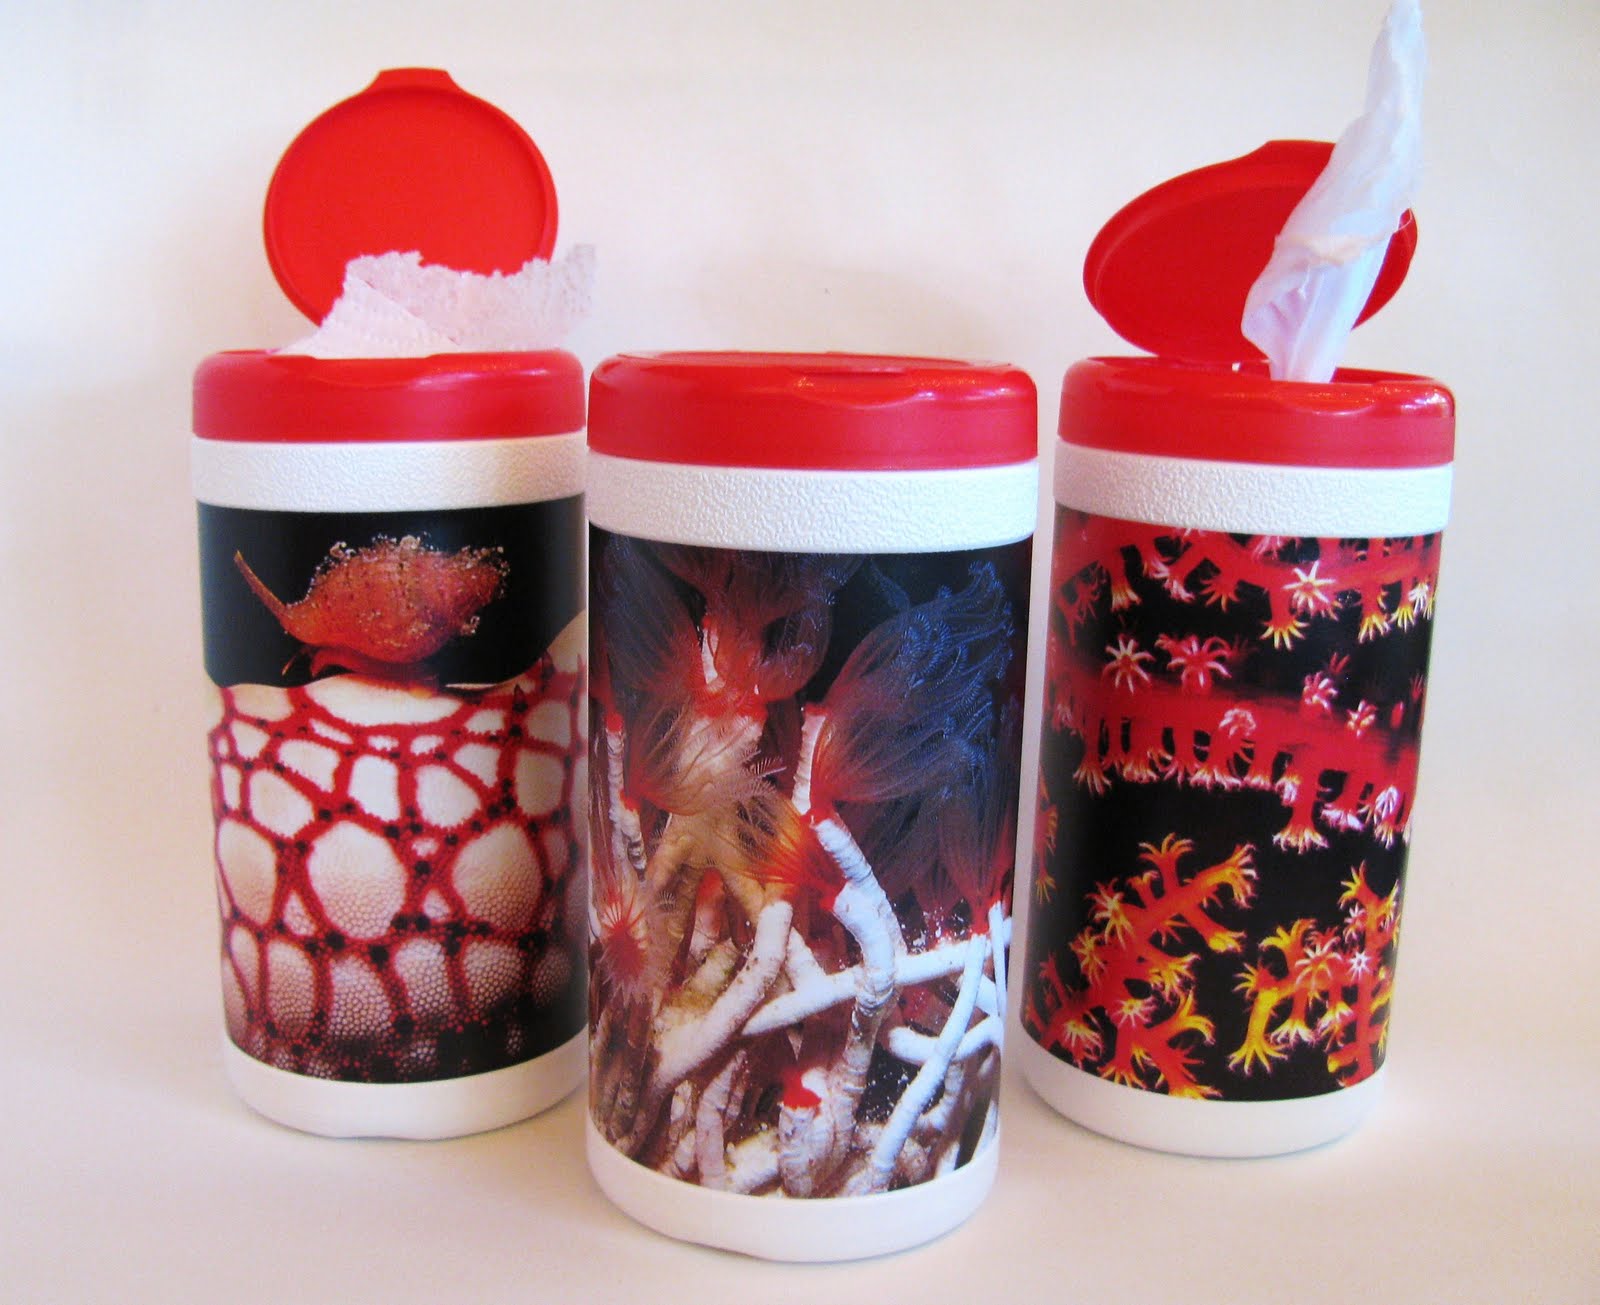 Now you have a beautiful container to put anywhere and keep just about anything in! Here are some of the ones I've made. In the right hand one it is still being used as a moist towel holder that I keep on my work table. Once the towels are used up I will just replace them with a fresh roll so my towel holder on my art table will inspire instead of detract!
The left one holds small squares of paper toweling I use when I paint my beads and other polymer clay components. They used to be all over my work space and took up too much room and clutter, now they are neat and pretty to look at and easy to find as well!

See what Ideas you can come up with to use yours for! And share with me in the comment section, I'd love to hear from you!
If you want to use them all together with art supplies you can print off labels and tape to them over you art work so you can easily grab what ever you need .
67
What a great idea for corralling paper towels. I have them all over the place, too --for polymer clay (I use them as a last sanding/polishing step sometimes) and painting. I can't just throw away a piece with a few smears of paint on it. I'm stingy and like to recycle.
ReplyDeleteBut I doubt I could make a container look as good as yours. They're great!
"cool red mustache project"
ReplyDeleteI am waiting for that one on your site! =D
I use the small bug wipes containers as a portable garbage can to collect all the stray bits of wire and thread that I used when I take my beading on the road.
I am also crazy about using the square tissue boxes as garbage bins in my car. I hoard them obsessively.
I have never made them pretty though. Great idea and would make a fun project for a girl scout troop!
Enjoy the day!
Erin
Thanks Mrs Treasurefield! :) I love to create and we need so much too create but I need so sense of order to be creative!
ReplyDeleteErin, You made me laugh again, thanks!
You also gave me an idea. I use a brown paper lunch bag, taped to the side of the table I do my jewelry assembly on for those bits of wire and other bits. I love to go barefoot and want my studio floor to be safe and though this the best way so when hubby does the trash he just takes the whole thing if it's full. Safer than him dumping a bag out. But now that I think of it, it would be a great container to put that kind of thing in and safer to empty and no wasted bags!
Also I think that this would be a great place to put all those leftover pieces of wire that are just too big to throw away. I have them in one of my wiring boxes, but they get lost amongst the larger pieces and coils.
I always have one or even two of these with the wipes in the car as well, maybe it's time to pretty them up a bit! As well as making one for used wipes, we always have so many of those to clean out of the car.
Thanks for the ideas!
:) You have a great day too!